Application Menu / Properties
System Maintenance Menu -> Configure System Settings -> System -> General Settings -> Application Menu Selection -> Edit Custom Menus option -> Application Menu / Properties
This utility can be used to manage and build custom menus.
•Build / Maintain Custom Menus:
After selecting the Edit Custom Menus action, select the menu tree to be displayed on the right panel, or click ADD and setup a new custom menu.
Usage of this menu selection window can be used in two different ways, depending on how it is accessed.
•Initially the pop-up menu window can be used to add a new, or select an existing custom menu that can be customized in the right panel of the Application Menu Maintenance utility.
Only custom menus or the Additional Options menus can be selected.
•This same pop-up window can be used to re-select a custom menu by clicking on the SELECT MENU button at the top right of the MENU MAINTENANCE (right) panel in the Application Menu Maintenance screen.
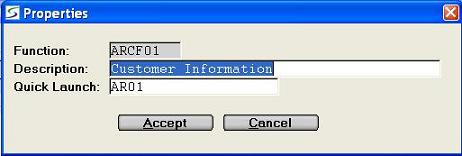
•Properties:
This version of the pop-up window can be accessed from the PROPERTIES button on the MENU MAINTENANCE (right) panel of the Application Menu Maintenance screen, providing the ability to view existing menu information.
The menu Description and Quick Launch code can also be modified in the Properties window.
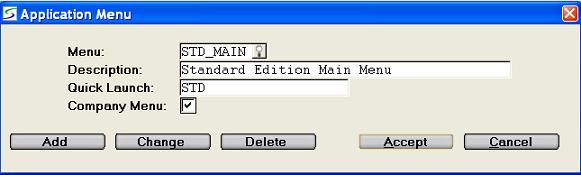
The 'menu selection pop-up' and 'properties' windows displayed above include the following prompts:
MENU
This field applies only to custom menus.
e.g. CMM:0004 General Ledger: Additional Options
This prompt is only displayed in the select Application Menu window when triggered on first accessing the Application Menu Maintenance, or if the operator clicks the SELECT MENU button at the top right of the MENU MAINTENANCE (right) panel in the Application Menu Maintenance screen, to allow a custom menu to be selected to populate the right panel of the screen.
This prompt is not displayed in the Properties window.
In Add mode enter a new custom menu code, or in Change mode enter the existing custom menu code to be modified or select one from the Menu Search window.
Only custom menus are listed in the search window, as standard menus cannot be changed.
Note: If a custom menu has been defined as the default Company Menu, it can be pulled up by entering a + (plus sign) in this field.
FUNCTION
This prompt only appears when the Properties window is triggered for a menu or menu option by highlighting the option in the tree on the MENU MAINTENANCE (right) panel and then clicking the PROPERTIES button.
It is display only and shows the program name of the function.
N/A is displayed for menus as a function does not apply.
DESCRIPTION
Enter the menu name as it is to be displayed on the Navigation button, or if this is a sub-menu or menu option enter the name to be displayed in the menu tree.
QUICK LAUNCH
Enter the Quick Launch code that can be used to pull up the custom menu from the Main Menu of Texada SRM.
Note: Quick Launch codes are assigned by Texada Software to the standard SRM menus and options.
This enables legacy Menu Option codes (e.g. AP01, CO11, SM2001) from earlier versions of the software to still be used, as set in Custom Function Parameters.
In event of a conflict, Quick Launch codes over-ride any legacy codes.
COMPANY MENU
This prompt is only displayed if the select Application Menu window was triggered on first accessing the Application Menu Maintenance, or if the operator clicks the SELECT MENU button at the top right of the MENU MAINTENANCE (right) panel in the Application Menu Maintenance screen.
Check this box if this menu should be the default start menu for operators in this company that do not have a preferred start menu assigned in the Default Sign-On Menu field of Operators.
Uncheck this box if this menu should not be the default start menu.
Note: If this box is checked for more than one menu, then the last menu checked is applied, and must be "unchecked" again to return to the last "Company Menu" selection.
ACTIONS:
Additional actions provided by buttons on the Select Menu screen include:
•Delete a Custom Menu using the select Applications Menu utility:
Click the DELETE button, and select the menu to be removed to delete an entire custom menu.
Confirmation is required.
When a menu is deleted an audit record is written to the Delete Log for function MENU01.
If the menu is currently assigned as the Default Sign-On Menu for an operator in Operators, the option is provided to select a replacement starting menu to assign to those operators.
Note: The Delete option is not provided if this window was triggered from the PROPERTIES button.
Topic Keyword: MENU01 (3913)